
How to Estimate a Drywall Job (Step by Step)
Learn how to estimate a drywall job step by step: measure walls and ceilings, calculate square footage, add a waste factor, convert to sheets, and estimate compound, tape, bead, and labor hours.
by Eng. José Manuel Siso Colmenares • 7/4/2026 · Updated: 9/20/2026

Updated: Sep 20, 2026.
Every profitable drywall bid starts the same way: with accurate quantities. Before you can talk about price, markup, or margin, you have to know how much board the job needs, how much compound and tape will go into the seams, how many corners get bead, and how many labor hours it takes to hang and finish it all. Get the takeoff right and pricing becomes straightforward. Get it wrong and no amount of markup will save the job.
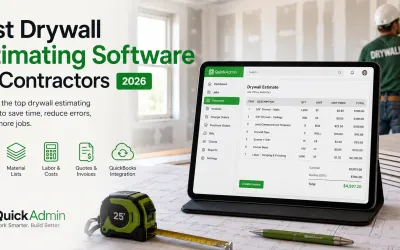
This guide walks through how to measure and estimate the quantities for a drywall job, step by step, with a worked example you can follow. It stops at quantities on purpose. Once you have them, see how to price drywall jobs to turn them into a profitable bid, use the drywall estimate template to lay the numbers out cleanly, follow the drywall estimate-to-invoice playbook for the full workflow, and compare tools on best drywall estimating software.
Quick answer: To estimate a drywall job, measure wall and ceiling areas, add them up, add a 10 to 15 percent waste factor, divide by sheet size to get sheets, then estimate compound, tape, corner bead, and fasteners, and finally estimate hang and finish labor hours by finish level.
Step 1: Measure the walls and ceilings
Start with a tape measure or laser and record the raw dimensions of every surface that will receive drywall. For each wall, note the length and the ceiling height. For each ceiling, note the length and width. Write these down room by room so nothing gets lost, and photograph the space so you can double-check later without a second trip.
For a quick residential takeoff, many contractors do not subtract standard doors and windows. Leaving those openings in the number gives you a built-in cushion for offcuts and mistakes. On jobs with large openings, such as garage doors, sliding glass walls, or double-height windows, subtract those so you are not badly over-ordering.
Step 2: Calculate the square footage
Turn each measurement into an area. A wall is length times height, and a ceiling is length times width. Add every wall and ceiling together to get the gross board square footage for the job.
Keep your rooms grouped so you can sanity-check the total. A small bedroom that comes out to 900 square feet of board is a sign you multiplied something wrong. Consistent, room-by-room math is also what makes your estimate easy to defend if a client questions the size later.
Step 3: Add a waste factor
Drywall gets cut, trimmed, and occasionally damaged, so you never install exactly the square footage you measured. Add a waste factor to the gross area before you order anything. A 10 to 15 percent allowance is standard: use the lower end for large, open surfaces with few cuts, and the higher end for rooms full of corners, closets, soffits, and openings.
Skipping this step is one of the most common estimating mistakes, and it always costs you a trip back to the supplier and lost crew time mid-job.
Step 4: Convert square footage to sheets
Once you have the board area with waste included, divide by the size of the sheet you plan to use. A 4x8 sheet covers 32 square feet and a 4x12 sheet covers 48 square feet. Larger sheets mean fewer seams to finish, which can save finish labor on big open walls, but they are heavier and harder to handle in tight spaces.
Always round up to the next whole sheet, because you cannot buy a partial one. That rounding is a normal part of the estimate, not padding.
Step 5: Estimate compound, tape, corner bead, and fasteners
With your sheet count in hand, estimate the finishing materials using rules of thumb, then refine them against your own job records over time.
For joint compound, a common starting point is about one box per 10 sheets for a standard taping and finishing sequence, with more needed for higher finish levels. For tape, budget roughly 0.4 linear feet per square foot of board. For corner bead, count the outside corners and multiply by the wall height, since bead comes in 8-foot and longer pieces. For fasteners, plan on a box of screws that covers your sheet count, typically about one pound of screws per two to three sheets. These are estimates, so the contractors with the tightest numbers are the ones who track real usage and adjust their rules of thumb job after job.
Step 6: Estimate hang and finish labor hours by finish level
Labor is where most of the money is, and finish level is the biggest driver. Estimate hang labor from your crew’s real production rate, usually expressed in sheets per hour. Estimate finish labor separately, because finishing runs at a square-foot-per-hour rate that changes dramatically with the finish level.
Level 4, the residential standard, uses three coats over joints and fasteners sanded smooth. Level 5 adds a full skim coat over the entire surface, which can add 30 to 50 percent more finish labor because you are troweling the whole wall, not just the seams. Always write the finish level on the estimate, and price the extra skim coat when Level 5 is required. If you want the full breakdown of what each level includes, the drywall estimate-to-invoice playbook and best drywall estimating software for small contractors both cover finish levels in depth.
Step 7: Add overhead and markup
The quantities and labor hours give you the direct cost of the job. To turn that into a bid, add overhead to cover your business costs (truck, insurance, tools, office time) and then apply a markup for profit. Markup is a percent on cost; margin is profit as a percent of the selling price. A 20% markup yields about 16.7% margin (markup ÷ (1 + markup)). If your goal is 15–20% margin, set markup accordingly (about 18–25% on cost). Once your quantities are solid, follow how to price drywall jobs for the full method, and use job costing after the job to check whether your estimate held up.
A worked drywall estimate example
Let’s estimate a single bedroom to see the whole process end to end. The room is 14 feet by 16 feet with 9-foot ceilings, finished to Level 4.
Measure and calculate square footage. The wall perimeter is 2 × (14 + 16) = 60 feet. Wall area is 60 × 9 = 540 square feet. The ceiling is 14 × 16 = 224 square feet. Gross board area is 540 + 224 = 764 square feet, and we leave the door and window in as part of the cushion.
Add waste and convert to sheets. With a 12 percent waste factor, 764 × 1.12 ≈ 856 square feet to order. Using 4x8 sheets at 32 square feet each, 856 ÷ 32 ≈ 26.75, which rounds up to 27 sheets.
Estimate materials.
| Material | Quantity | Unit | Rate | Total |
|---|---|---|---|---|
| 1/2” drywall board | 27 | sheets | $14 | $378 |
| Joint compound | 3 | boxes | $16 | $48 |
| Joint tape | 2 | rolls | $6 | $12 |
| Corner bead | 4 | pieces | $3 | $12 |
| Screws and fasteners | 1 | lot | $25 | $25 |
That is a materials subtotal of $475.
Estimate labor hours. At a hang rate of about 5 sheets per hour, 27 sheets take roughly 6 hours to hang. Finishing 764 square feet at Level 4, across taping, coats, and sanding, comes to about 9 hours. That is 15 labor hours total. At a loaded labor rate of $45 per hour, labor is 15 × $45 = $675.
Roll it up. Direct cost is $475 materials + $675 labor = $1,150. Add overhead at 10 percent ($115) to reach $1,265, then apply a 20 percent markup on that cost basis ($253) for a price before tax of $1,518. That markup is not a 20% margin: profit ÷ price is $253 ÷ $1,518 ≈ 16.7% margin. If you need a true 20% margin, use about 25% markup on cost instead. Add tax on materials only at 7 percent ($33), and the estimate total at 20% markup is about $1,551.
Every figure here traces back to a measurement or a production rate, which is exactly what makes an estimate defensible. Swap in your own unit costs and crew rates and the same steps hold.
Common drywall estimating mistakes to avoid
The estimates that go wrong tend to fail in the same places. The most frequent is forgetting the waste factor, which leaves you short on board and burns crew time on a supply run. Close behind is estimating for the wrong finish level, since the gap between Level 4 and Level 5 labor is large enough to erase your profit if you quote the cheaper one and build the more expensive one.
Contractors also routinely underestimate finish labor, because finishing is slower and more variable than hanging, especially on ceilings and in rooms with many corners. Others forget to separate cleanup and debris removal, then cannot justify the cost when the client asks. And many skip the overhead-and-markup step entirely, quoting direct cost as if it were the price, which guarantees a job that pays for materials and hours but nothing else. The fix for all of these is to track your real numbers, write the finish level on every estimate, and treat any scope added after approval as a change order rather than free work.
FAQ
How do you calculate the square footage for a drywall job?
Calculate drywall square footage by measuring each wall (length times height) and each ceiling (length times width), then adding the areas together. For a quick takeoff, many contractors do not subtract standard doors and windows, letting those openings act as part of the waste allowance.
What waste factor should you use for drywall?
Most drywall estimators add a 10 to 15 percent waste factor to account for cuts, trimming, damage, and offcuts. Use the higher end of that range for rooms with many corners, openings, or angled walls, and the lower end for large open surfaces.
How many drywall sheets do I need?
Divide the total board square footage (after adding the waste factor) by the area of one sheet. A 4x8 sheet is 32 square feet and a 4x12 sheet is 48 square feet. Round up to the next whole sheet, since you cannot buy a partial sheet.
How do you estimate drywall labor hours?
Estimate hang labor from your crew’s sheets-per-hour rate and finish labor from a square-foot-per-hour rate that varies by finish level. Higher finish levels such as Level 5 take more hours because they add a full skim coat, so track your real production rates and adjust over time.
How much joint compound and tape does a drywall job need?
A common rule of thumb is about one box of joint compound per 10 sheets and roughly 0.4 linear feet of tape per square foot of board. These are starting points; keep records from finished jobs so your material estimates match your actual usage.
How is estimating quantities different from pricing a drywall job?
Estimating quantities is the takeoff: how much board, compound, tape, bead, and labor the job needs. Pricing turns those quantities into a bid by applying unit costs, overhead, and markup. You need accurate quantities first, then a pricing method to build a profitable number, which is covered in how to price drywall jobs.
Related drywall guides
Keep building your estimating system with these related guides: